


Hi there! I’m Cindy, also known as “Radar” on the Appalachian Trail. A few years ago, I set out to complete a thru-hike of the A.T.—as an outdoor adventurer, a thru-hike had been on my bucket list for years. I just had to know if I could do one!
But even with years of hiking, camping, and outdoor experience, packing for a multi-month trek felt overwhelming. Initially, I spent countless hours researching and testing gear as I prepared for my hike, trying to figure out what would work best.
Now, after accomplishing my thru-hike, I’m here to share what I learned along the way to make your packing process easier.
The Challenge of Packing for a Thru-Hike
Packing for a thru-hike is a balancing act. You need lightweight, small, durable items that can withstand abuse and various weather conditions without breaking the bank.
Every thru-hiker’s goal is to have each gear item be a quality product in as few ounces as possible.
Choosing Gear: The Selection Process
After devouring extensive information on backpacking gear, I made a massive list on a whiteboard of every piece of gear I could possibly need (which you don’t have to do, because I’ve listed them all on a downloadable packing checklist here!).
Once you’ve downloaded that list, I’ve also created a comprehensive guide covering every item needed to equip yourself for an A.T. thru-hike. These articles are designed to provide practical, real-world advice, helping you make informed decisions about every piece of gear for a safe and successful hike.
With my list in hand, I approached gear selection one item at a time. I tested each potential piece of gear on shakedown trips and day hikes. After each test, I decided whether to include or exclude the item, ensuring my final packing list consisted only of gear truly suited for me on the trail.
Next, let’s examine the “big three” and discuss the most important considerations for each.
The Big Three
Almost nothing else is as important as starting the trail with a reliable sleep system, shelter, and backpack. (I would also add shoes!)
Sleep System
A thru-hiker’s sleep system consists of a sleeping bag (or quilt) and a sleeping pad.
Sleeping Bag (or Quilt)
Sleeping bags and quilts will keep you warm and comfy at night, right down to their rated temperature. Determining the right one for you depends on your needs. Assess the level of warmth you desire, how heavy of one you want to carry, and how you sleep.
Sleeping quilts do the same job as a sleeping bag with less material, making them lighter and more compressible but generally not as warm. Sleeping bags offer better insulation but tend to be heavier and bulkier.
You’ll also need to choose between down (hardier and provides more warmth at a lighter carrying weight) and synthetic (dries faster, cheaper, stays warm when wet, and is hypoallergenic) bags or quilts.

For me, I wanted a zipper (since I am an active sleeper) and warmth, but at a lighter weight if possible. I opted for a 20-degree temperature-rated Enlightened Equipment synthetic quilt called the Convert, which served as a combo sleeping bag and quilt in one with a full-length zipper. (I also wanted a synthetic bag because the A.T. is a notoriously wet trail.)
I loved the versatility of my Convert! With an adjustable foot box and drawcord neck closure, I could completely cocoon myself on chilly nights.
While many quilts are lighter, the Convert, thanks to its full-length zipper, provided warmth and flexibility in a still relatively lightweight package.
Sleeping Pad
A good sleeping pad adds warmth and comfort by insulating and protecting you from the ground. When seeking a sleeping pad, consider its comfort, weight, durability, noise level, and R-value. (Also, be aware that your sleeping bag’s temperature rating was based on the assumption that you are using it with a 5.5 R-value sleeping pad.)
Most A.T. thru-hikers choose between air pads (compact, heavier, more comfortable, more expensive) and closed-cell foam mats (bulky, lighter, less comfortable, cheaper).
My husband and I went through a lot of trial and error with sleeping pads. Too many mornings, we woke up flat on the ground.
Eventually, the one we found to be the most durable and quiet in a lightweight package was the Therm-a-Rest NeoAir Xlite NXT Pad. I can’t recommend it enough! Save yourself the drama and just get this one from the get-go!

- The standard for ultralight backpacking. The XLite NXT mattress delivers unrivaled comfort and warmth for minimal weight
Shelter
The Appalachian Trail has shelters for overnight stays, but they fill up fast. If you’re hiking in the bubble, you may arrive and find them already packed.
Tents

Hiking with a tent option (beyond shelters) is ideal for weather and nighttime protection.
There are two popular types of tents on the trail: non-freestanding and freestanding.
Non-freestanding tents are fantastic for those looking for the lightest possible shelter option. But they usually come at a higher price point. Those seeking weather protection at a lower price point with more sleeping space will likely prefer freestanding tents.
My husband and I picked the freestanding Big Agnes Copper Spur HV UL3 Tent because it was lightweight, compacted down to a small size, and provided us with loads of room when set up. It was also more affordable than lighter, non-freestanding options.

- FULLY REDESIGNED – One of our best-selling, full-featured, ultralight backpacking tents, the Copper Spur HV UL series just got better with new features inside and out, proprietary materials that are stronger and lighter, and hardware that makes setting up even easier
This tent held up well for us. It was a quality product; we loved that it always dried quickly after the rain!
Hammocks
Some hikers opt for hammocks with a rain fly instead of tents as a shelter option. They say it provides much-needed relief for their back or knees. After sleeping in one in the past, I knew they weren’t for me.
However, those who’d like relief in those areas nightly should take some time to read up on hammocks and give one a test ride!
Backpack
Your pack will become your best friend and hold everything you need along your trek. Carrying capacity, frame structure, and fit are the most critical elements to evaluate when choosing a pack.
Most thru-hikers opt for packs with a carrying capacity of 50L to 65L.
When figuring out what size capacity will work best for you, look at your packing list and assess whether you’re an ultralight hiker or someone who will be bringing some extra luxuries along. (While being aware that you want to try not to have more than 20% of your body weight on your back.)
Many hikers are told to gather all their gear before choosing a backpack so they know they’ll pick a pack that can carry the weight of everything.
I ended up doing the reverse.
After some test hikes with weight, I decided I wasn’t willing to carry more than 30 pounds. So, I chose a pack that could hold 30 pounds and kept the weight of all my gear below that allotted total poundage.
Either option is fine; do what sounds best for you.
Frame Structure Options
The three main pack frame styles are External, Internal, and Frameless.
External frame packs used to be the popular option for carrying heavy loads. However, you rarely see external frame packs on the trail these days because internal frame and frameless packs have become very good, and all the other gear has become lighter.
Between internal frame packs and frameless packs, internal frame packs will give you the most structure and better distribute the pack weight on your body, but they will weigh more.
Frameless packs will weigh less but aren’t meant for heavy loads and, therefore, aren’t made for displacing heavy loads across someone’s body. They can’t carry much more than 20-25 lbs. If you hike with one, you fully commit to carrying ultralight gear in your pack to keep it effective.

I opted for the Osprey Aura AG 65L Women’s Backpack because I discovered I needed the support and structure of an internal frame pack.

- Curved zip access on one side of panel
Before my trek, I went on test hikes with frameless packs and even briefly attempted to switch to one during my thru-hike.
However, each time, I noticed the same problem—without an internal frame, my body felt awful. The lack of structure left me in constant pain, and the frameless pack I tested on the trail almost ended my hike.
I ended up accepting the added weight of an internal framed pack and sought weight savings elsewhere.

On the other hand, my husband was able to switch to a frameless Hyperlite Windrider 55L Backpack and make it work for him! At first, he was nervous about losing 10 liters in carrying capacity. He wondered if he could fit everything he needed in it.
Since frameless packs lack structure and are basically one big chamber, he had to learn how to fill his pack efficiently so that most of the weight would rest on his hips.
He initially found the frameless pack less comfortable, but over time, he got used to it. Ultimately, the switch helped him purge unnecessary items, making the rest of the journey lighter and easier.
Bonus Item: A Fanny Pack
While those “big three” items are super important, I’d also like to make the case for adding a versatile and well-built fanny pack to your gear list! It’s a small item that makes a massive difference on the trail.

While preparing for my thru-hike, I tested several different fanny packs, but Chicken Tramper’s 2.5L Fanny Pack (now the SwitchPack) really stood out.
What I loved about it was its durability and strength. Before even heading out on the trail, I could tell it was going to hold up, and years later, I can vouch that it does!
It handled heavier objects, such as electronics, with ease, and its abrasion resistance made it much more durable than many competitors.
The fanny pack material is waterproof; however, the zipper is water-resistant. So, I Ziplocked anything in the fanny that needed protection from water and wore my rain jacket over the pack when it rained heavily. I never had a problem with anything getting ruined inside.
This fanny pack was literally dragged across numerous mountain climbs in the northern states and repeatedly drenched. The pack (as well as everything inside it) held up like a champ.
There are two primary reasons I find fanny packs helpful as a thru-hiker (and in life since):
A) They let me get small, heavy items off my back.
B) I do not have to constantly stop hiking and take off my pack to find an item I use throughout my day hike.
Getting Items off My Back
A fanny pack helps redistribute some of your pack weight elsewhere. (This is helpful for everyone, but even more so for those who are shorter or smaller.)
Since my sleeping quilt and pack were heavier than I had hoped, I knew I needed a strong fanny pack to carry small, heavy items, such as my battery bank, somewhere other than on my back.
Not Having to Stop
Fanny packs hold snacks, phones, and anything else you may want to easily access during a hike. Wearing one is invaluable because it saves time.
Countless moments on my thru-hike were made easier because I didn’t have to stop down and rummage through my pack.
And then, once home from my thru-hike, I wondered if fanny packs were more helpful for thru-hiking than for day-to-day life. But that is not the case. I’ve found them just as useful in post-thru-hike life, whether I’m out for a solo day hike or adventuring with pets or kids.
There really is something about stopping and rummaging through a larger bag that becomes annoying, takes up time, and inevitably stalls the trip.
Even on my most recent hike, while testing the newer version of the fanny pack I thru-hiked with, the Chicken Tramper 2.5L SwitchPack, I kept wondering, “Why don’t I wear this all the time?” The time savings were undeniable.
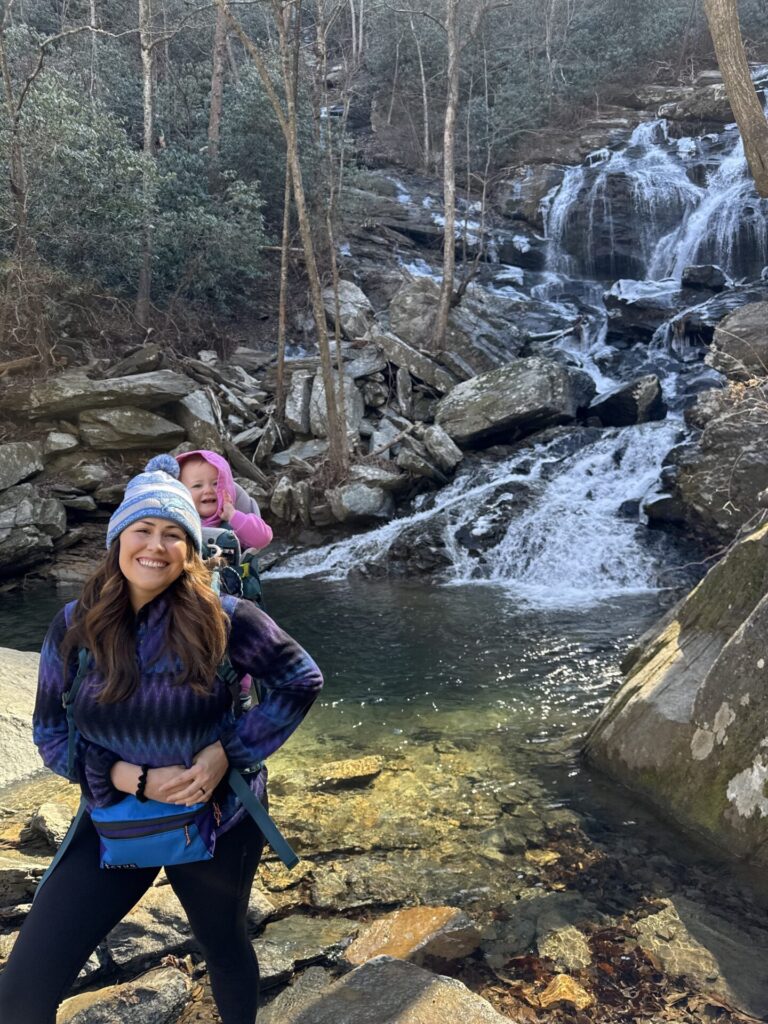
Grabbing my selfie stick for a picture was a cinch, which in turn meant the baby was still happy for the picture. When I carry it in the baby backpack, the time spent rooting around for it, even if it is just a few fleeting moments and movements, sometimes causes me to lose my happy baby, who adamantly wants to keep moving at all times.
When I wanted a snack, I didn’t have to stop the whole party to grab it out of the bigger bag. I just reached down and pulled out my snack.
When it warmed up, and my baby’s hands got too warm in her mittens, my husband could pull them off and hand them to me. I zipped them in the fanny as I continued on.
These sound like small moments, and they are, but they have a significant impact on the hike and day when they are all added up.
Everything Else
To learn more about all the other packing categories, including clothing, footwear, food, hydration, support items, safety items, repair items, electronics, navigation, hygiene, bug management, and luxuries – jump on over to this page and pick from the category you most want to learn about next!
While those top three categories are top priorities for just about every thru-hiker, balancing essentials and luxuries in these other categories will look different for everyone. I recommend going through my list and assessing each item for yourself to see whether you feel it’s necessary.
Practical Packing Tips
What follows are some of my most practical packing tips for any future A.T. thru-hiker:
Avoid Overpacking
For many (myself included), this is easier said than done initially. But over time, you’ll figure out what you really need and stick to the essentials for shelter, sleep, cooking, navigation, and personal care.
It’s really helpful to have a home-based person you can ship items back and forth to while you’re initially figuring this out. (My person was my mom. Thanks, Mom!)
Invest in Anything with Multipurpose
Having any item that can help you in multiple ways is a huge win on a thru-hike! This enables you to keep weight down and gives you more pack room.
A classic example of this is that many hikers opt for using their puffy as their pillow.
Buy a Food Scale
While accumulating gear for your thru-hike, use a simple food scale to help you understand how many ounces each item you’re about to put on your back weighs. Knowing the weight of everything will help you when you need to make cuts.
Know How to Fit & Load a Backpack
To properly size a backpack, you must first know your torso length (the distance from your C7 vertebra to your iliac crest).
To find it, tuck your chin and have a buddy measure from the bone protruding at the top of your spine to the spot on your back that lines up with the top of your hips.
Any REI or similar outfitter can measure you for a backpack. REI specifically can also fill the pack you’re considering with weighted sandbags and visually assess how it sits on you with weight. They also have a generous return policy if you find out the pack isn’t for you.
When loading your pack, you want your burdensome sleep items at the bottom, then the heavy and large items you don’t need throughout the day in the middle, and then what you’re most likely to need on the trail on top.
Adequately distributing your weight throughout your pack helps ensure that the bulk of it (75-80%) rests on your hips.
If you opt for a frameless pack, it is even more important to be aware of how you place all your gear in the pack.
Be Prepared for All Weather
Of course, there are certain times of year when you can send home the really warm stuff and lighten your load. That said, you should always have your puffy, beanie, and rain gear because you never know what weather conditions will pop up when you’re cresting mountaintops daily.
Hike with Safety & Repair Gear
It can be tempting to skip safety and repair gear items. After all, hiking with added weight you may never even have to use can feel like a pain.
When it comes to safety items, you never know what can happen. It’s better to have them than not. Saving a few ounces is not worth your well-being.
For repair items, if you’re a faster hiker, you may be able to get away with taking a day off to go find them in town. However, as a slower hiker, I can’t tell you how many times I was grateful I could repair my shoes or tent on the trail without adding a new zero day.
Take Your Pack for Test Hikes
Test hikes are super important before taking off on your thru-hike! We started ours three months ahead, slowly adding more weight to our packs and more miles to our walk throughout the 12 weeks.
While on test hikes, check that the pack is loaded comfortably and is accessible.
Wrap-Up: Packing for a Thru-Hike
Packing for a hike of the entire Appalachian Trail may seem daunting, but with the right gear and mindset, you’ll be ready for the adventure of a lifetime! Remember to pack smart, stay flexible, and enjoy the journey.
Want more tips?
👉 Guidance for understanding how long an Appalachian Trail thru-hike may take you.
👉 Learn from my trail journals.
👉 Read more shelter advice here.
👉 Read more sleep system advice here.
👉 Read more backpack advice here.
- Packing for a Thru-Hike: How I Chose My Gear for Trail - January 8, 2026
- A Complete Two-Day Guide to Visiting Death Valley from Las Vegas - December 16, 2025
- Hiking the Appalachian Trail: Week 9 – Grayson Highlands Ponies & Longhorns - November 30, 2025