- A Thorough Guide of Car Camping Necessities (+ Printable Checklist) - July 6, 2024
- McAfee Knob Hike: A Guide to the Iconic Appalachian Trail View - May 24, 2024
- What is Boondocking? A Detailed Guide. - May 16, 2024

Do you want to get into backpacking? Awesome! But perhaps you’re not sure about how to plan a backpacking trip. Well, let’s get you started!
Hi there, I’m Cindy! As someone who loves hiking, I’ve devoted much of my time to exploring trails. In 2022, my husband Barrett and I kicked it up a notch and decided to thru-hike the Appalachian Trail!
However, despite having years of hiking and camping under my belt, believe it or not, when we started our Appalachian Trail thru-hike, it was only my third backpacking trip EVER!
I know firsthand that preparing for a backpacking adventure can seem daunting. After all, it demands extensive research and consideration.
Whether you’re a beginner or an experienced backpacker, relying on a simple guide like this can be incredibly beneficial to ensure you cover all important aspects.
This article aims to simplify planning a backpacking trip, helping you avoid feeling overwhelmed.
With a diverse range of experiences outdoors, I’ve curated a set of steps that make planning a backpacking trip straightforward and ensure that essential measures are not overlooked.
Follow these step-by-step tips to ensure nothing is forgotten and to maximize your enjoyment in the wilderness.
1. Define What You Would Like Out of This Adventure
Starting the planning process for a backpacking trip should involve an initial focus on defining the adventure’s purpose.
Consider whether you aim for a physically demanding experience, a peaceful connection with nature, or a well-rounded blend of both.
Identify what you want to achieve from this experience.
Whether it’s proving your capabilities on your first backpacking journey or surpassing previous elevation gain milestones, establishing specific goals for your trip is important.
Specifying your objectives and aspirations sets the foundation for a personalized backpacking experience that aligns with your unique preferences and ensures a rewarding adventure.
2. Use That Information to Choose Where You Will Go
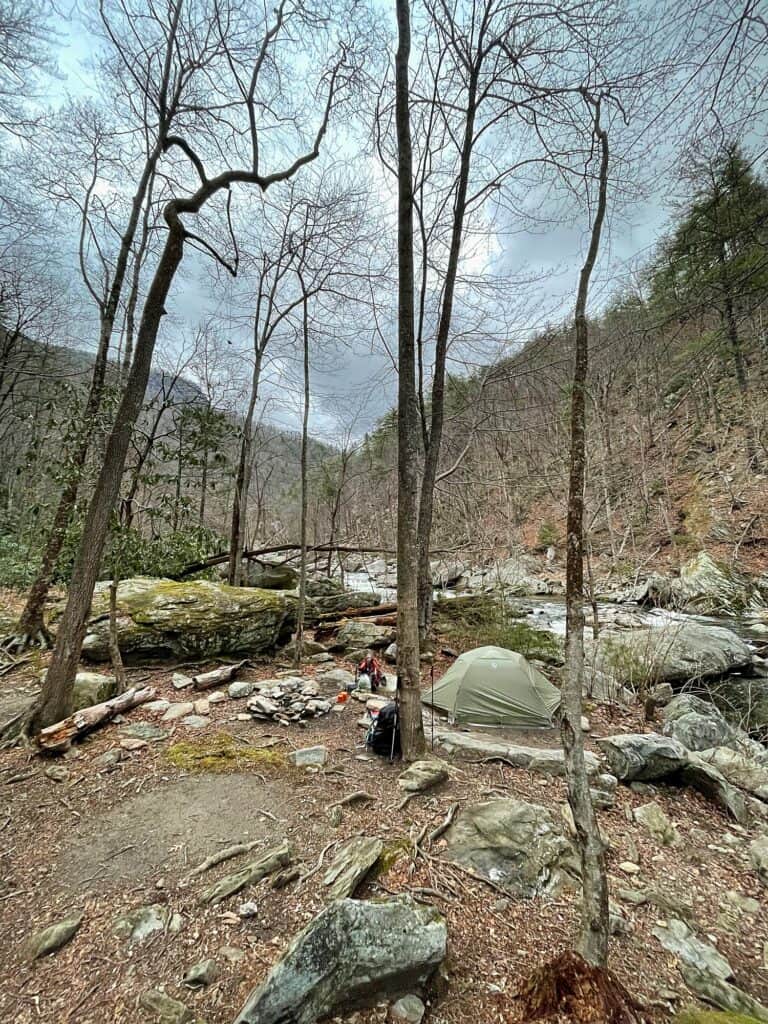
After defining your goals for your backpacking journey, the next necessary step is choosing your destination.
Take into account essential factors:
✅ What terrain do you prefer – mountains, forests, coastal areas, or something else?
✅ Consider climate conditions, ranging from rainy and sunny to humid or dry.
✅ Assess the difficulty level of your chosen location and pinpoint attractions or landmarks you wish to explore, such as panoramic mountain views, ocean vistas, glacier lakes, and more.
Thinking through these factors ensures your chosen destination will align with your preferences, enhancing the overall experience of your backpacking journey.
Resources for Picking a Trail:
Various resources are available to assist you in selecting the ideal trail for you.
These include guidebooks, the official websites of national and state parks, social media platforms, blogs, and specialized trail apps like FarOut, AllTrails, and Gaia GPS.
Always cross-check information from multiple sources when making your trail selection to ensure accuracy and reliability in your decision-making process.
3. Set a Budget for Your Trip
Like any travel plan, evaluating your financial capacity when organizing a backpacking adventure is necessary.
Take into account various elements, including:
✅ Travel expenses
✅ Gear costs or rentals
✅ Permits
✅ Accommodations before, after, or even during your trip if it’s a long one
✅ Food
✅ Prepare for unforeseen expenditures
Thoroughly research the anticipated costs associated with your chosen destination in advance.
Also, consider setting aside additional funds for unexpected situations, such as equipment repairs or unforeseen fees.
By establishing a budget, you can organize your backpacking trip to align with your financial resources, ensuring a hassle-free adventure that won’t strain your finances.
4. Decide How Long Your Trip Will Be
Another significant factor to consider is the desired duration of your backpacking excursion.
Are you planning a weekend escape, an extended long weekend, a week-long venture, or an even more prolonged backpacking journey?
Your chosen timeframe significantly shapes your journey’s preparation.
The trip will be most enjoyable if you allocate ample time for a comfortable trek and ensure that your supplies and gear are correctly tailored to the length of your trip.
5. Choose When You Will Go
Evaluate whether you plan to embark on your backpacking adventure during a holiday weekend, in the middle of the week, or on a regular weekend. For those with a 9 to 5 job, assess whether you’ll need to use vacation time and take into account your available time off.
Further considerations involve selecting the season for your backpacking venture and deciding if you prefer moderate, warm, or frigid weather.
These choices are pivotal in customizing your backpacking plans to suit both your schedule and seasonal preferences.
6. Complete Further Research About Your Destination
Okay! You’ve picked where you’re going, for how long, and when. Great job!
Next, you’ll want to thoroughly research your intended destination and gather relevant information before starting your trek, covering aspects like:
✅ Trail conditions
✅ Weather patterns
✅ Local rules and regulations
✅ Potential hazards
Be mindful that certain backpacking trails may have designated camping areas, emphasizing the importance of following specific rules.
Another component to research in advance is to be aware of the local wildlife; for instance, if grizzly bears inhabit the area, packing bear spray is advisable.
Explore local resources, blogs, hiking apps, and guides to understand the trail you choose comprehensively.
This meticulous research empowers you to make well-informed decisions, reduce risks, and prepare thoroughly for the unique characteristics of your chosen destination.
Will Permits Be Required?
It’s necessary to research in advance whether permits are required. Many backpacking trails require permits to regulate the number of hikers in popular spots or designated camping areas.
In certain places, park rangers actively inspect permits, highlighting the importance of obtaining one beforehand to comply with regulations and have proof on hand if necessary.
7. Plan Your Trip by Creating an Itinerary
Building an itinerary for your trip is the next phase of preparing your backpacking expedition.
Having a structured plan will allow you to outline daily hiking distances, estimated durations, possible camping sites, planned visits to attractions or landmarks, designated break intervals, and any other vital tips deemed significant for your itinerary.
With backpacking, it’s also important to maintain flexibility.
You’ll likely have to accommodate potential adjustments due to weather fluctuations, unforeseen detours, or the need for additional breaks. It’s key to ensure that your itinerary realistically aligns with the terrain and your physical fitness level.
A thoughtfully crafted itinerary holds the potential to significantly enhance your overall backpacking experience, providing a reliable guide throughout your trip.
8. Book any Necessary Transportation
Securing your transportation is another key step in the planning process.
Do you plan on leaving your car at a trailhead for the duration of your trip?
If so, you’ll have to figure out how you will be returning to it. You’ll also have to assess if that specific trailhead is safe for leaving your car.
Additionally, a shuttle bus is sometimes required to access trailheads instead of leaving your car overnight for an extended period.
Making your transportation arrangements as much in advance as possible is essential since services often have limited capacity.
9. Obtain Backpacking Gear & Maps
The backpacking gear you bring is fundamental to the success of your trip.
Integral gear includes items like a backpack, shelter, sleeping bag or quilt, appropriate clothing, sturdy hiking shoes, an adequate food supply, water filters, and various other necessities.
Additionally, it’s crucial to have maps readily available to maintain a clear understanding of your route at all times.
Shop Backpacking Gear
When I first started researching backpacking gear, I found the amount of information and gadgets out there completely overwhelming!
You may feel the same right now, especially if you’re a beginner.
Upon returning home from my Appalachian Trail thru-hike, I created a comprehensive gear guide that covers all of the gear that, after tons of research and in-field experience, my husband and I have deemed worthy of your consideration.
Click below 👇 to see the guide.
🥾 A Complete Appalachian Trail Gear List: Realistic Packing for an AT Thru-Hike in 2024 🥾
10. Test Your Backpacking Gear
You will want to test your equipment once you’ve obtained your backpacking gear.
The most important pieces to test are your backpack and shoes. However, this step could also involve practicing setting up your new tent or inflating your sleeping pad.
Test out anything new to you before hitting the trail so you don’t have to learn in the elements. Doing so ensures you are familiar with how each item works and helps identify any potential issues or the need for replacements before embarking on your trip.
Do a Mock Pack
A practice packing session entails organizing all your gear inside your backpack to ensure a proper fit.
This step is vital for both beginner backpackers and experienced individuals who have recently acquired new gear.
You’ll want to fully load your pack and first ensure it feels comfortable while it’s fully loaded with all your gear.
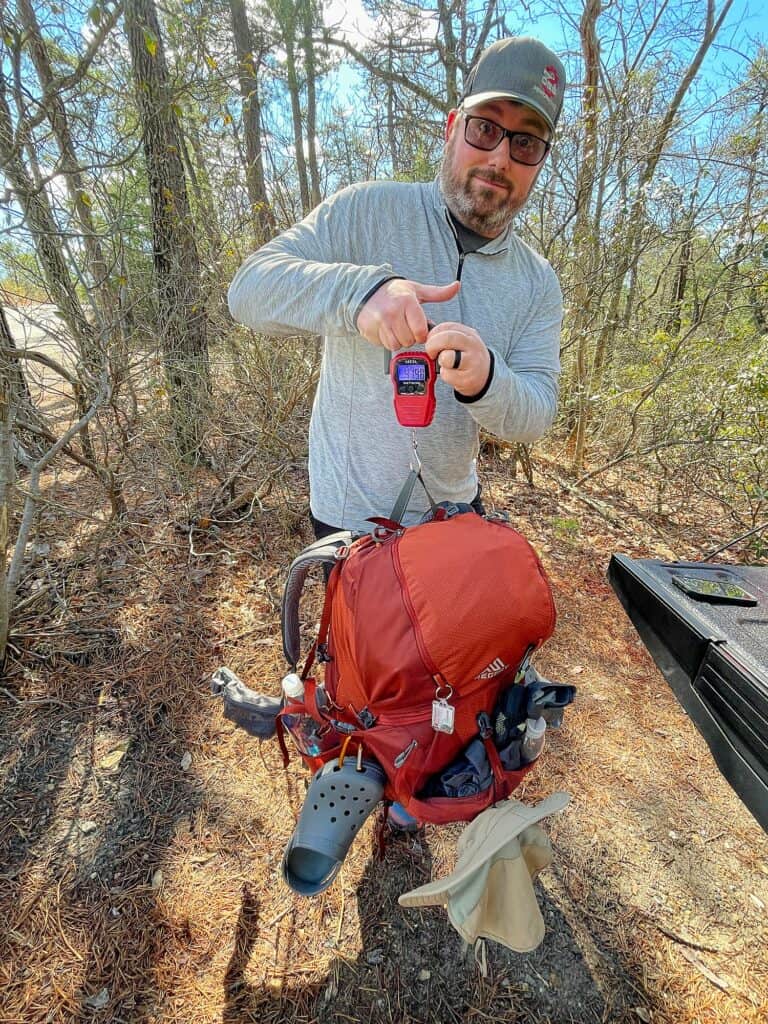
If your pack seems uncomfortable while fully loaded, know it’s a good standard to avoid having more than 20% of your body weight on your back.
If your pack weighs more than 20% of your body weight, you must assess your gear item by item to see where you can shed some weight.

I found weighing the pack was easiest with one of these luggage/fish scales:
- Portable Digital Scale - A portable digital scale with a clear backlit LCD display is very suitable for being used outdoor because its weight is only 8.3 ounces, and the blue LCD backlight with data locking makes you easy to read the value at day and night. The hanging scale is powered by 2 AAA batteries (included).
And weighing gear items was easiest with one of these food scales:
- 6 WEIGHT UNITS: This kitchen scale features 6 weight units which can be easily and manually switched by pressing the UNIT button: g / kg / oz / lb/ ml / plus a separate mode for weighing liquid or milk volume. NOTE: The battery is covered by the insulating film, which should be removed when first use of the scale. The battery will Auto-Off after 2 minutes.
👉 However, if your pack weight is adequate, your next step would be determining whether or not your pack is fitting correctly. REI has an excellent guide for sizing and fitting a backpack.
11. Train for your Backpacking Trip
While planning a backpacking trip, training plays a significant role in ensuring you’re prepared.
For beginners, I suggest starting with several hikes and brief camping trips before diving into a more extensive backpacking adventure. This strategy allows you to gauge your fitness levels and gradually acclimate to the outdoor environment.
If your goal is a multi-day backpacking journey, consider starting with smaller trips and scaling up the challenge.
Training instills confidence and a sense of ease, guaranteeing that you are well-equipped for the demands of your upcoming backpacking experience.
It also helps you feel confident with your pack weight and enables you to assess whether you need to ditch any gear to save some weight.
12. Create a Food Plan
Meal planning is a key aspect of preparing for your backpacking adventure.
Determine the number of meals you’ll have each day, choose the snacks to pack, and decide on the quality and quantity of quick and convenient meals.
You will find yourself focusing on foods that pack a nutrient punch in as lightweight of a package as possible.
Here’s a photo of the food I brought on a three-day shakedown backpacking trip before thru-hiking the Appalachian Trail. 👇 The goal of that trip was to test out all of these food items, see what I enjoyed eating, and assess how much food I needed.
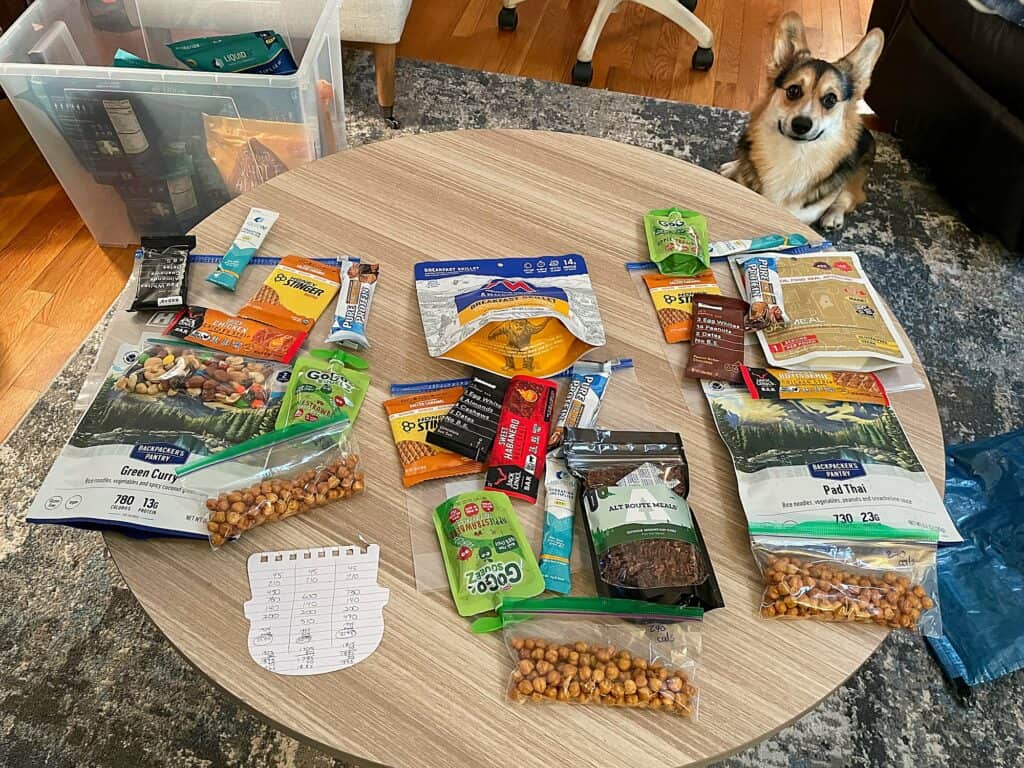
Also, considering alternative on-the-go options will be vital if you foresee heating water for every meal as unfeasible.
Resupplies
Resupplies are crucial for long-distance backpacking trips, especially those covering extended periods where carrying all needed supplies from the start would be impractical.
Backpackers on a journey longer than a few days typically plan resupply points along their route to replenish food and other items.
Planning your resupply points beforehand allows you to travel lighter while ensuring you know of resources ahead that will help you sustain yourself throughout your adventure.
13. Share Your Plans with Friends or Family
You may not think informing friends or family about your plans is important, but please don’t skip this step.
Letting someone know about your trip ensures that others know your location in the wilderness in the case of any unforeseen events and lets them stay updated on your progress.
An option for doing this, which I used and loved on my thru-hike of the Appalachian Trail, is through the “check in” feature on the FarOut app.

With this app, you can “check in” and digitally record where you are at any point throughout your journey.
I like this feature for safety reasons because you can decide who can see the check ins, providing a private way to share your progress with friends and family.
I hope no one reading this gets in an emergency, but if you do, sharing your plans along the way allows for a swift response in crises since authorities can be notified of your location if they ever need to check on your well-being.

Also, Share Your Emergency Plans
Emergency plans are essential preparations and strategies crafted to handle unforeseen situations that may occur during your backpacking trip.
It’s crucial to communicate your plan to family or friends, designating them as emergency contacts to be notified in case of unforeseen events.
14. Research Current Conditions
Before starting your journey, take time to investigate the current conditions of your destination.
This proactive approach contributes to better preparedness for your trip.
Water
Water is a vital factor to assess in backpacking. It’s imperative to confirm the availability of ample water sources along your journey. Doing so ensures convenient refilling and prevents the risk of running out.
Water knowledge is another area where the FarOut app shines. Since other hikers and backpackers update the app’s water information as they hike, I found it more valuable and up-to-date than any information provided in guidebooks while hiking the Appalachian Trail.
Check ahead to see if the trail you are hiking is on FarOut. If it is, this will be one of the best features you get out of the app!
Weather
Weather is another crucial consideration.
It’s essential to check the anticipated highs and lows, allowing you to pack appropriately and ensure you’re well-prepared, avoiding discomfort from excessive heat or cold during your journey.
You’ll also want to prepare for rain, snow, or any other conditions that might occur.
15. Before You Start:
Before taking off on your backpacking adventure, you’ll need to know a few things.
Continue reading below as I highlight two of my favorite tips.
Download Offline Maps
While I recommend having a physical map, I also suggest pre-downloading offline maps for the area of your hike.
You can download these maps on your smartphone and smartwatch.
Cell service is often lacking on trails; having the area map downloaded ahead of time enables you to navigate your route without relying on having service.
Know About Leave No Trace
Understanding and sticking to the seven principles of Leave No Trace is crucial.
Preserving our trails in their original or improved condition allows us to enjoy and appreciate nature sustainably.
Be sure to avoid littering and stay on designated paths to ensure the flourishing of the environment.
16. Pack & Go!
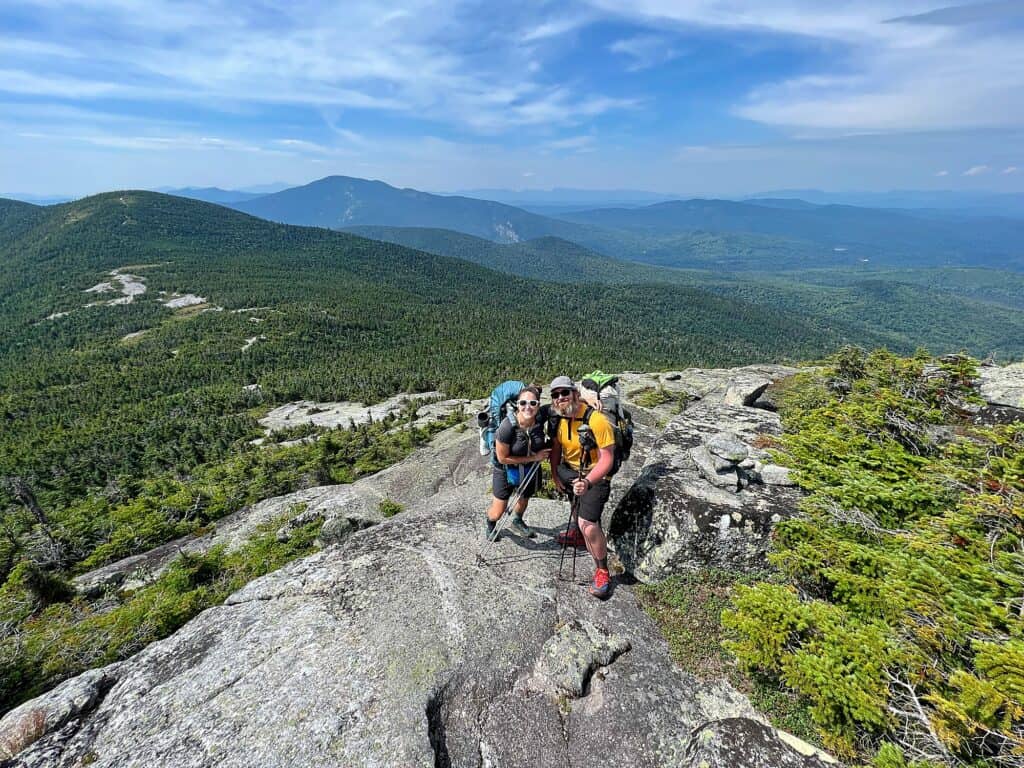
The final stage in preparing for your journey is to pack your gear and set off on the trails! Have a great time!
Beginning in Backpacking FAQs:
How Do you Plan a Backpacking Trip for Beginners?
To plan a backpacking trip for beginners, you must start by setting your goals, picking your desired destination, and training for your adventure.
Follow my tips above as I give you a step-by-step guide to successfully planning a backpacking trip, whether you are a beginner or an expert.
How Do I Plan a Successful Backpacking Trip?
To plan a successful backpacking trip, you will need to start by doing research and setting goals.
Follow my guide above as I walk you through all the steps for planning a memorable trip.
How Much Money Do You Need to Be a Backpacker?
Backpacking can often be seen as a pricey activity. Others see it as one of the most budget-friendly ways to travel.
The truth is that backpacking can be accomplished on various budgets, just like many other things in life.
If you want to get started with essential gear items like a backpack, tent, and sleeping bag at a low price point, visit your local REI garage sale section and resale stores, and watch Poshmark, Facebook Marketplace, and eBay for deals.
What is a Good Length for a First Backpacking Trip?
A good length for a first backpacking trip is between 10 to 15 miles, with one or two nights of camping.
Is 40 Too Old to Go Backpacking?
Of course not! Forty years old is not too old to go backpacking.
As a matter of fact, every year, people in their 70s and even 80s attempt a thru-hike of the Appalachian Trail.
Age is just a number, and the capability to go backpacking at age 40 or older primarily relies on one’s physical health and fitness.
At any age, before heading out, you should consider any existing medical conditions you may have and consult with a healthcare professional if you have any concerns about your physical readiness for a backpacking trip. If you’re new to backpacking or haven’t done it in a while, start with a shorter trip and gradually increase the difficulty as you gain confidence and experience.
Ultimately, age alone should not stop anyone from backpacking. Many individuals in their 40s and up find backpacking and hiking rewarding.
Is 50 Pounds Too Heavy for Backpacking?
Fifty pounds is likely too heavy for backpacking.
Most backpackers try to keep their backpack weight as light as possible. Keeping your pack weight low helps you hike at a reasonable speed, is ultimately more comfortable, and puts less strain on your joints.
Many hikers use the “20% body weight” rule, which suggests your backpack should not exceed 20% of your body weight.
However, this is a general guideline, and individual preferences and capabilities will vary.
Ultimately, the appropriateness of a 50-pound backpack depends on your comfort and fitness level. However, minimizing your load by prioritizing essential items and opting for lightweight gear is best.
What is the Big Three Weight in Backpacking?
In backpacking, the “Big Three” are your backpack, sleep system, and shelter.
They are often the most important and heaviest gear pieces in a backpacker’s setup.
How Do I Choose the Best Backpack?
Many personal preferences are involved when choosing the best backpack for you.
When shopping for a pack, it’s essential to consider the carrying capacity you need, the frame structure that will be best for you and your carrying capacity, and the pack’s fit.
🎒 Read more about getting the best backpack for you here. 🎒
Conclusion: An Easy Guide to Planning a Backpacking Trip in 16 Steps
There is nothing like the thrill of an incredible backpacking trip.
As an avid hiker and backpacker, I know that these essential tips on planning a backpacking trip are necessary to make your trip successful.
I hope this guide encourages you to plan your own backpacking adventure and helps you plan your next memorable excursion in the great outdoors.
You May Also Enjoy:
👉 The Ultimate One Day Badlands National Park Road Trip Itinerary
👉 A Smoky Mountain Itinerary for Every Type of Traveler & Everything Else you Need to Know
👉 14 of the Best RV Parks in North America According to 9 Lady RVers
👉 51 Answers to Your Most Pressing Full-Time RV Living Questions

